Chromebook 101: how to customize your Chromebook’s desktop
Chrome OS isn’t the most option-packed operating system around, but there are some things you can do to make your Chromebook’s desktop look and work the way you want.
Ready?
Customize your Chromebook’s wallpaper
First, let’s tackle your desktop’s basic appearance:
- Right-click anywhere on your Chromebook’s desktop and select Set wallpaper from the menu that appears.
- Click on one of Google’s categories to see a selection of preset images, or click the My Images option to choose an image from your own local storage.
- If you want your wallpaper to change to a new image every day, click the Change Daily button that’s available at the top of any of Google’s category pages. (That option, unfortunately, isn’t currently available with your own images.)
Customize your browser’s background
You can also personalize the page that comes up every time you open a new tab in your browser:
- Open a new tab in Chrome and click the Customize Chrome button (or the pencil icon) in the browser’s lower right corner.
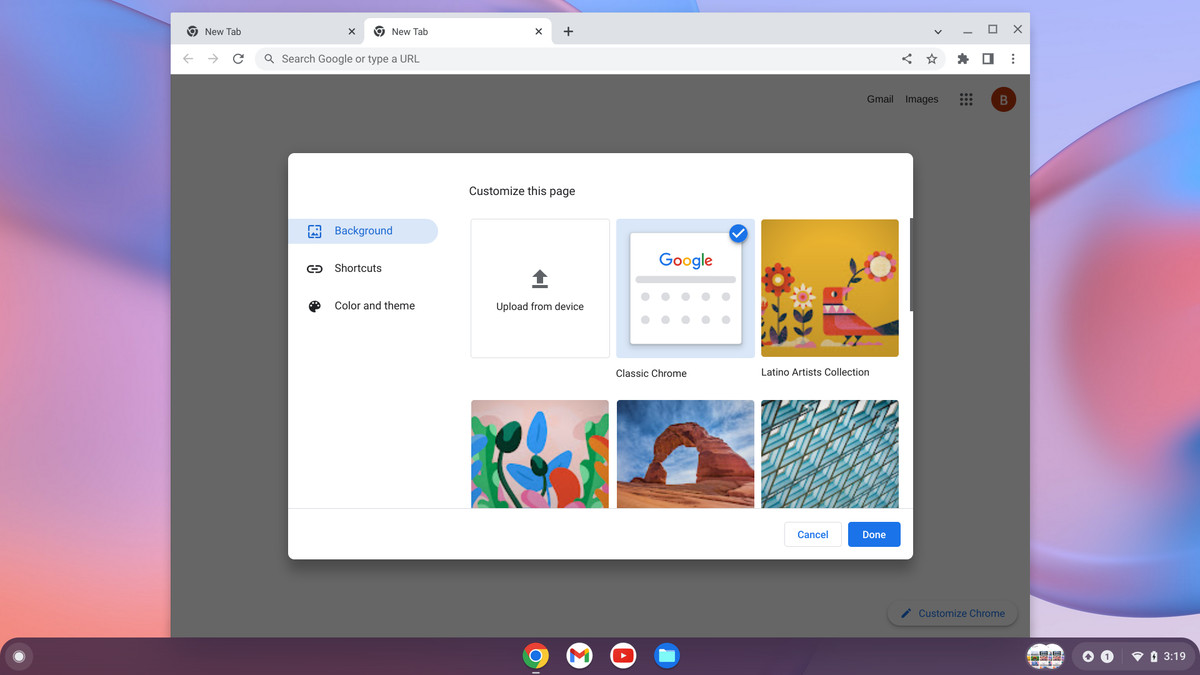
- Select Background to choose an image from Google’s collection or Upload from device to pick an image from your own local storage, then follow the prompts to find and confirm the image you want.
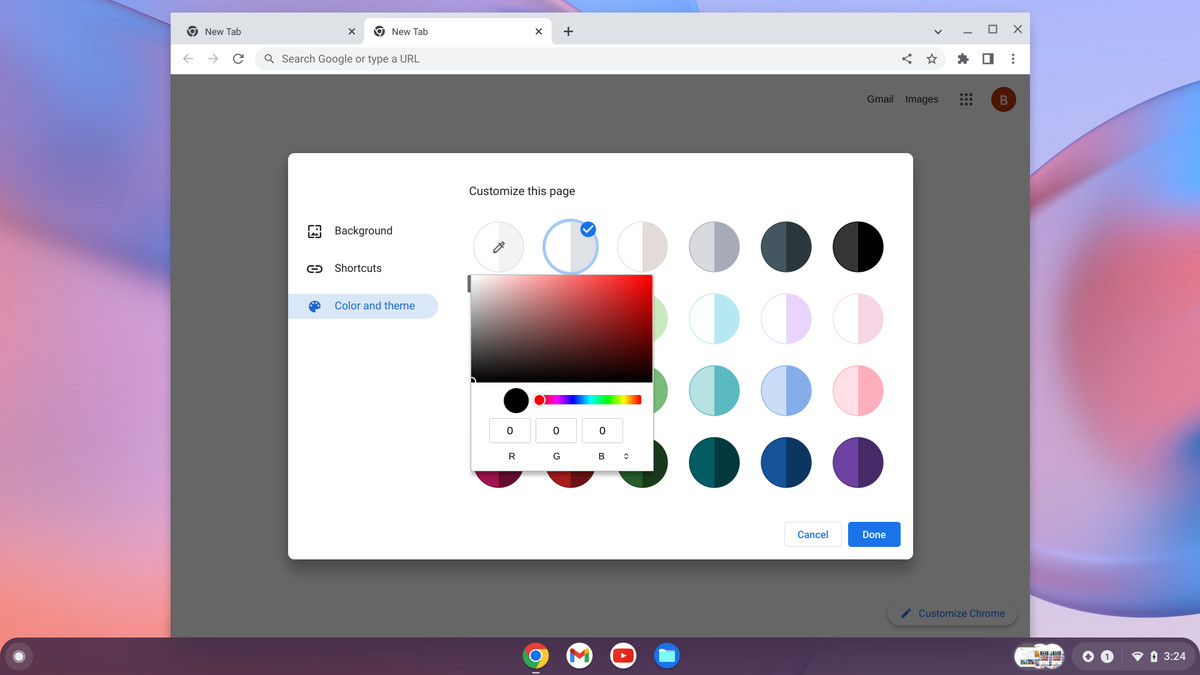
- Select Color and theme to change the look of the border of your browser and its background. You can choose from a number of preset themes, or click on the circle with the dropper icon, and you can choose custom colors.
Customize your Chromebook’s shelf
Last but not least, take control of the Chrome OS shelf — the dock-like row of shortcuts at the bottom of your screen. Start by selecting exactly what icons appear in that area:
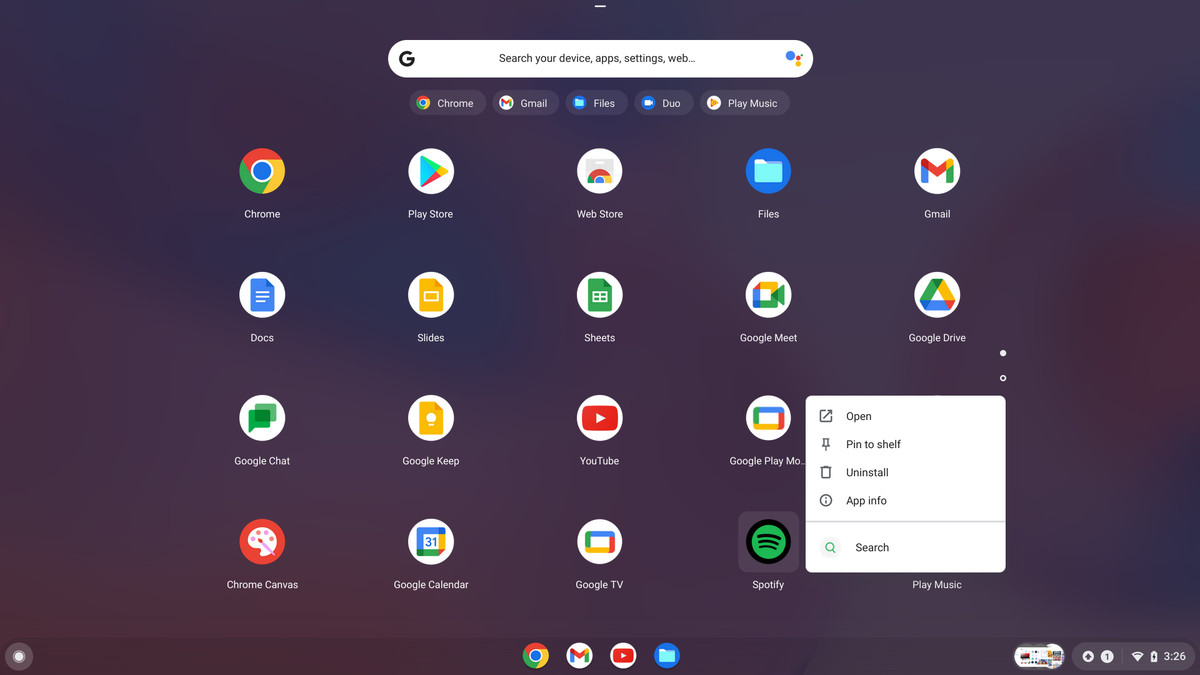
- Open your app drawer (by clicking the circle icon in the lower-left corner of the screen and then clicking the upward-facing arrow on the partial drawer that appears). Right-click any item in the list and select Pin to shelf.
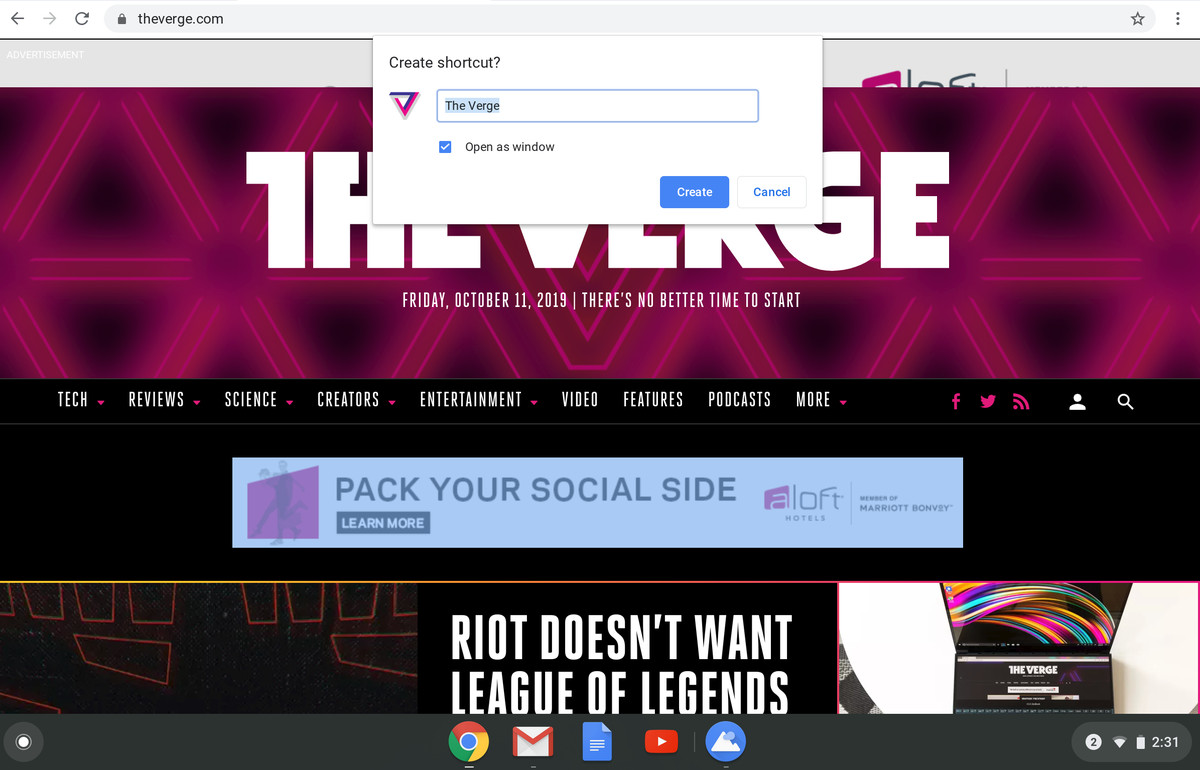
- If you want to add a website, open the site, click the three-dot menu icon in Chrome’s upper right corner, and then select More tools, followed by Create shortcut.
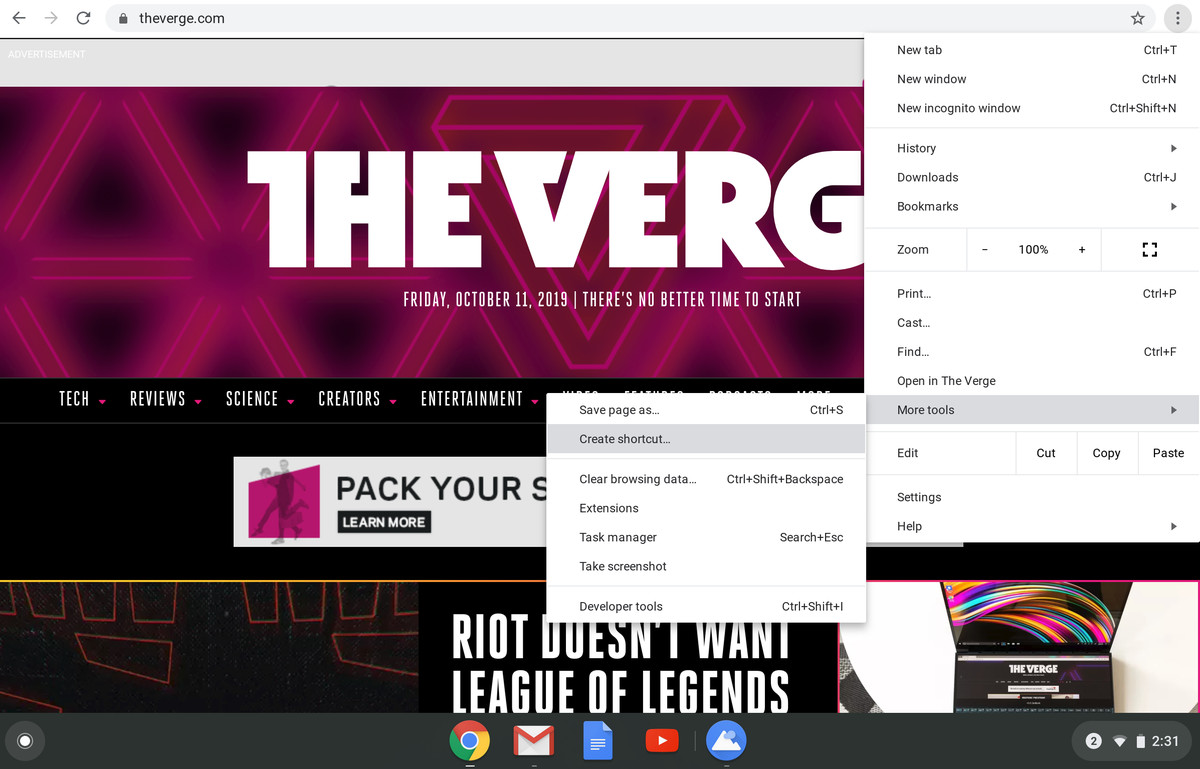
If you want the site to open in an app-like window, without the usual browser elements on top, click the Open as window option in the Create shortcut? pop-up window that appears. Then click the blue Create button.
- Drag and drop any of the icons in the shelf to change their position.
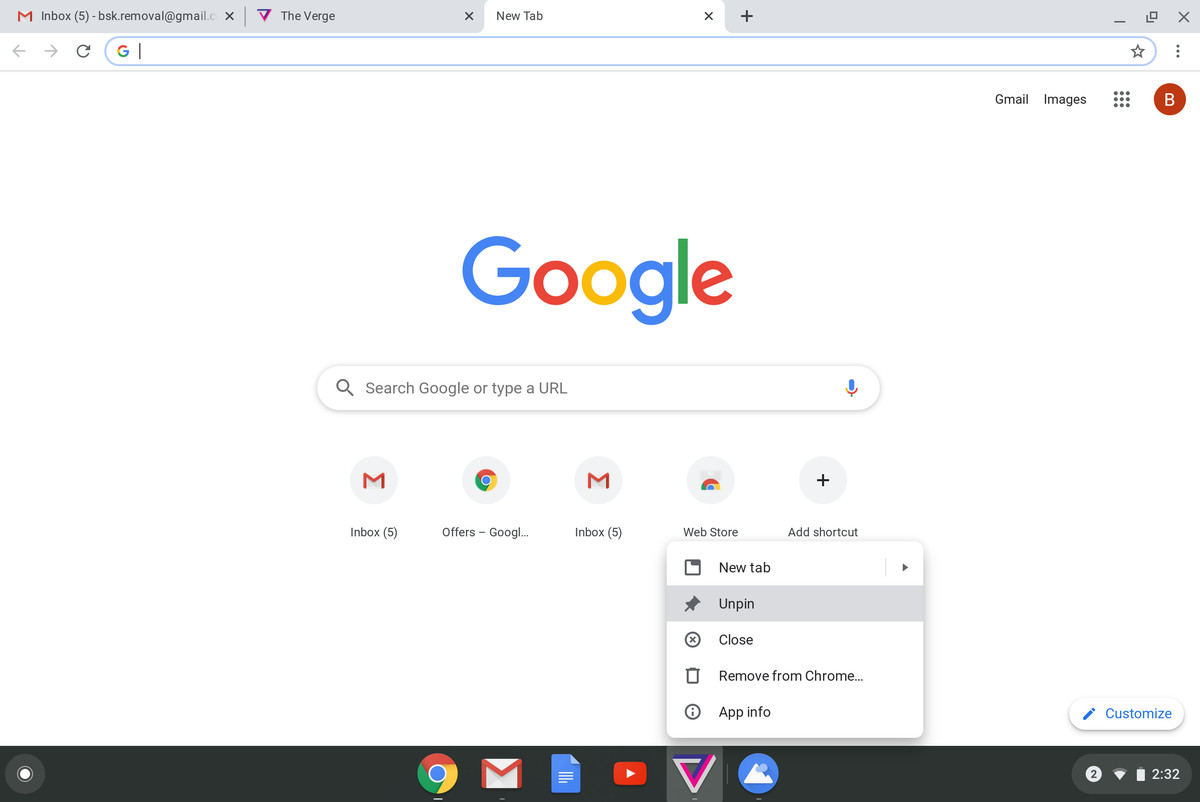
- Have you decided that you don’t want the icon in your shelf after all? Right-click on the icon and select Unpin.
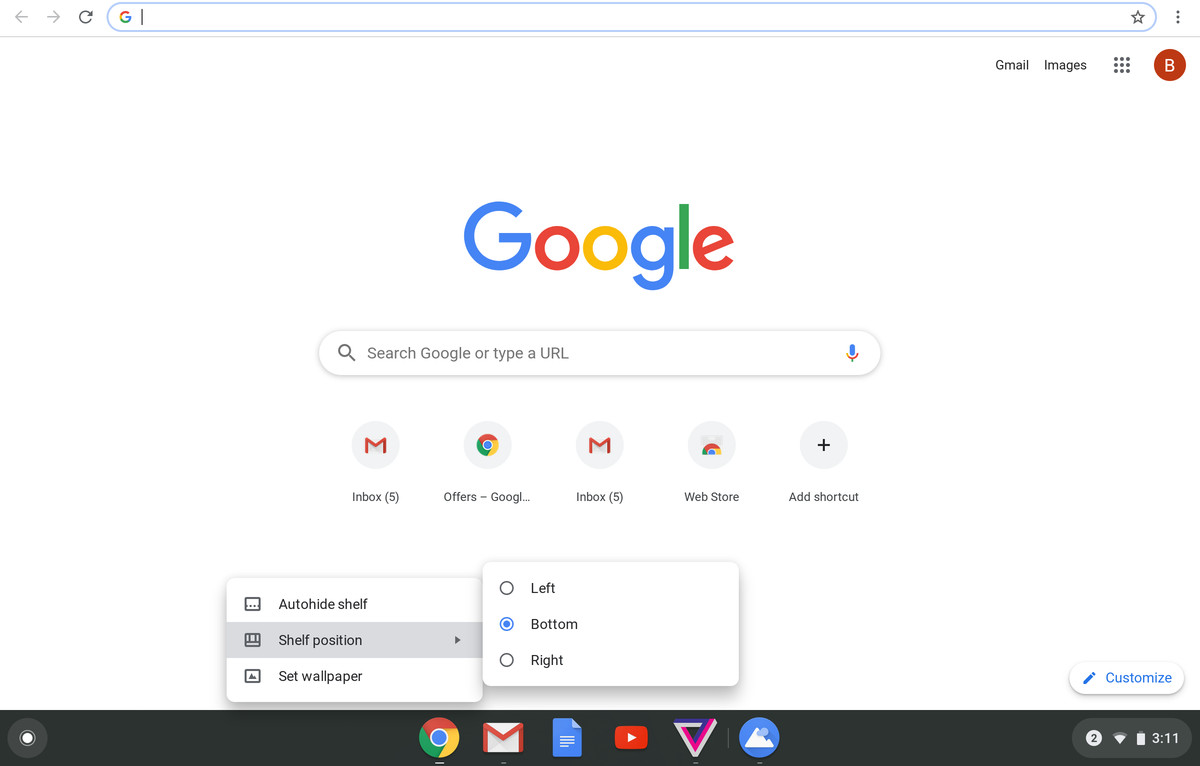
And one final pair of possibilities: If you want your shelf to appear on the left or right side of your screen instead of at the bottom, right-click anywhere inside it, select Shelf position, then select Left or Right. And if you want your shelf to remain hidden by default and appear only when you mouse over it, right-click the shelf and select the Autohide shelf option.
Update May 27th, 2022, 9:30AM ET: This article was originally published on October 12th, 2019, and has been updated to account for slight changes in the OS.
Read the full article Here

